Minky Blanket Tutorial
 I always find myself wanting to start projects this time of year. The cold winter months seem to drag unless I keep myself busy! It is also a great time of year to get organized and start the year on the right foot. I love to be prepared for birthdays, baby showers, wedding showers, etc. At the beginning of the year, I always try to collect and make my “gift stash” for the rest of the year. My favorite baby shower gift is this darling designer style minky blanket. I used this custom baby blanket several times when I had my baby and let me tell ya… they are the best! Not just for the baby – I also feel tempted to use it when I touch the soft minky blanket.
This is such a simple blanket to cut and sew. It is cheaper than a double sided minky blanket with binding. Plus it’s perfect for Winter and Summer babies!

The supplies you will need:
1 1/4 yard woven cotton print fabric
1 1.4 yard minky fabric
thread to match
and sewing supplies
Minky Baby Blanket Instructions
Start off by washing and drying your fabric according to the directions (check the bolt or online guides when purchasing). A new blanket could be irritating to the baby’s skin because it is soft and sensitive, so washing the fabric may help with that. Once they are dry, iron the cotton fabric. If you are planning to gift this to someone, I would suggest you select premium cotton. It is the type of fabric that creates velvety comfort with a lightweight and silky soft embrace for the baby.
I like to make my blankets a little bigger, so the width of fabric is important. My favorite size is 40 x 40 inches, it seems just perfect to wrap up and snuggle a little baby. Most minky fabric comes 60 inches wide, so if you wanted to get more for your money, you could make 2 blankets with the width by making them 30 x 36 inches. Decide the dimensions you want for your blanket.
The BEST way to cut 100% cotton woven fabric is to tear it. Start out by tearing the edge off of 2 touching sides. This will give you a perfectly straight line to work with. Then measure your dimensions (adding 1 inch for seam allowance) and tear the fabric at the correct length. To tear: clip the fabric about an inch in from the edge and pull on either side of the cut. I tore my fabric to be 41 x 41 inches.

Preparing to Sew
Once your woven fabric is torn you will have a perfectly square or rectangle piece to work with. Press the torn edges of the cotton fabric. Next lay out the minky fabric with the fuzzy side UP. You can be creative with the top part. Make your minky side with unique monochromatic prints or a high contrast unique fabric pattern. Keep solid colors on the reverse side. The best part of this easy baby blanket is that you can design it according to your plan in no time. Lay the cotton fabric with the print side DOWN. This will make the right sides face each other (My fabric below is opposite what you should do ;)). Line one of the cotton fabric edges with the selvage of the minky fabric.
 Cut the minky against the edge of the cotton fabric. You won’t need to cut the selvage edge since it should already be lined up with the other fabric.
 The right sides will already be facing each other. So place several pins about 5-6 inches apart around the edge of the blanket. Make sure you place a pin in every corner.

Sewing Your Minky Blanket
You’ll need a sewing machine, so if you have one, start the sewing project. Sew around the blanket with 1/2 inch seam. Leave a 2-3 inch opening. Don’t forget to back stitch!
Once it is sewn you will flip the blanket through the little opening you left. Push out all 4 corners. Speaking of corners, check out our Perfect Corners Every Time baby blanket tutorial for more inspiration! Happy sewing!
 Smooth the edges and top stitch around the edge of the blanket at 1/4 inch. Be careful when you sew over the opening you left, make sure you close the hole completely!
 If you need to press the edges use only a warm iron. Then you’re done!
 Your perfectly adorable little blanket! From start to finish this only takes about 30 minutes! Tie it with a ribbon and you are ready with the perfect gift! It would make a great christening gift too!
 Let me give a warning… You might get carried away with all the cute prints and different designs out there! I have to make one of these out of every cute fabric I find…… and…. I may or may not have some for myself 😉
You can find tons of adorable printed fabric and great deals on minky at Fabric.com. It is my favorite place to online shop.


Some of our other favorite homemade gift ideas for the little ones:


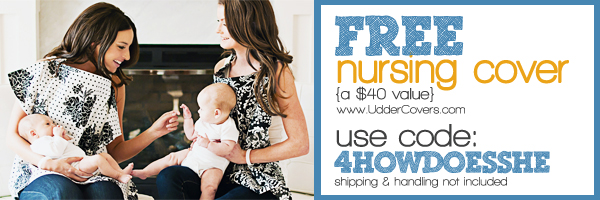
or order some for FREE – check out this post to get your FREE nursing cover, car seat canopy, and baby sling! There are a bunch of different trendy fabrics to choose from…so cute!


John miller says
oh wow! nice blog post. the printed cotton Minky blankets are amazing in look and they give the warmth in the thrilling winters.
Perkins Byrd says
Aaaaaaaaaaaggggggggggghhhhhhh how absolutely cute and easy. I’m all for easy:) I make hats for the kids at Children’s Hospital in Detroit, 130 so far, and am getting burned out on hats. Wanted something easy and different, and here it is! Going to make a zillion of these! What the hospital doesns’t use, they share with other hospitals. Keeps me busy and helps out others. I’m always buying material on sale and have tons of it. Some of it goes for dog coats for rescue groups, so something new, like this, keeps me from getting burned out on one project. Thanks so very much. The instructions are so easy to follow, finding your site was a blessing. Thank you!
Peach fur fleece says
thanks for sharing such valuable and effective tips for choosing good quality cotton print Minky blanket. colour and printed pictures are very attractive and nice.thanks once again.
Kristen says
Could you add pics of “tie it with a ribbon?” I’m not sure what that means. 🙂
Kimberly Swaney says
Kristen, I think she meant to make it look like a gift when it’s folded or rolled up 😊
Kocyki minky says
We love minky fabric and Love this tutorial! Greetings from Poland 🙂
Roselyn says
Love this tutorial! Made previously for friends who loved them and returning to it for my son and coming niece. Wanted to let you know, however, it’s not working from pinterest and cant repin it bc blocked saying could lead to spam. Hoping you can resolve this as i would love to keep this handy.
Katrina says
Don’t you need to turn in the edges to prevet freying?
Kay turner says
You don’t use a top dog foot? The last time i attempted making a blanket was dreadful. The kinky kept stretching ?
Melissa says
im having trouble the minky keeps bunching and shifting when I’m sewing and I even put double the amount of pins you did
Any suggestions
Cecilia says
Sweet baby model and great idea using minky and cotton fabrics for this adorable blanket. Minky intimidates me since I’m a beginner at this. What settings do you recommend for stitches,,needle,etc
Pam says
what kind of Minky did you use for the blanket in the tutorial?
Christine says
I’m expecting a baby girl in July and after re-pinning this, i went and bought lots of fabric to make this quick and easy blanket! I’ll be sure to feature this DIY in my blog once i’m done!
Maria says
Love your projects.
Erin says
I’m new at making minky blankets! What size cotton fabric would you recommend on using for an adult blanket? I bought two yards, but the width was too small. Should I look for a larger width cotton material and keep it at two yards? Thank you!
[email protected] says
How adorable! I really need to learn how to use a sewing machine before I have kids as I know I’ll be wanting to make them all sorts of cute things like this.
Margie says
About what size stitches did you use. on your Minky baby blanket? After I started the first seam, my top fluffy started to streach, so I am going to start over and use larger stitches and hold the fluffy and try to stretch the top a little so it will end up at the end without being longer. Does that sound like it would work?
Theresa says
Thank you so much for posting these directions and great pictures. I just made my first blanket and it turned out perfect.y. Thanks!
Maxine says
Where did you find the minky fabric? i looked at Jo-Ann’s online and couldn’t find it anywhere!
Emma says
Do you think I could add satin trim?
Alina says
I absolutely love the fury white part of this blanket ! Do you remember the name of it ?
Alisha says
I’m new at sewing and I’m really wanting to make a blanket like this but I have no idea what you mean by backstitching. Does that mean I need to overlap my stitches when I come around to where I started?
Fiona says
Hi,
LOVE your tutorial and have just finished my first blanket, though I used fleece instead of minky, its still lovely and soft.
I had a problem with my ‘opening’ however and although you said to be careful, for some reason the place I turned is a bit ‘flappy’ after topstitching. I’ve topstitched before but that was very close to the edge of the bib…I really would have needed to sew 1/8 in. to close it completely.
It may be the fabric i used? Anyway, any hints on now closing it? I’m wondering about some easy hand stitch or even some advice on how to stop this happening next time?
I originally did a 1/2 in seam and then a 1/4 in. topstitch.
thanks again!!
Amanda says
This is a wonderful and easy Tutorial. Which is good for a self taught beginner at sewing. Everything was worded perfectly, and that’s hard to find with me because I’m a visual learner.. I am pretty proud of how it came out. Thank you!
juli says
Has anyone ever found that Minky fabric she used? I NEED to get my hands on that kind. I searched alligator or reptile minky and no luck. 🙁
Shannon says
I can never get the minky to stay straight…no matter how many pins I use, it never comes out even with how I originally pinned it. What was your trick?
Courtney says
How did you get the minky and cotton fabric to stay without stretching while sewing? The minky keeps stretching and causing it to be uneven when seen together. Thanks. Love this blanket
Lacey says
LOVE THIS! I just bought mink not knowing how to make it.. Can’t wait to try this!
Holly says
When you stitched the blanket up with the sewing machine, did you go around the entire blanket? Or did you just stitch up the opening? When I made my first minky blanket, it was almost exactly like how you did this one.
jen says
Thank you for this, great tutorial!! i am new to sewing and i tried. although it came out cute, i found it somewhat challenging to keep the minky in place. it seemed to either stretch to much or bunch up a bit. do you have any recomendations for this? Thanks!!
Ali says
That blanket is adorable and almost as easy as doing the no-sew blankets!
Judy says
I made some burp cloths and didn’t wash the fabric. Is that going to turn our bad???
Megs G says
I am ordering fabric tomorrow and planning on making one of these. I am wondering, I hate sewing knits and stretch fabrics, do you think that microfleece would work well in this blanket? I have a brand I love that is quite plush and doesn’t pill that I use when making diapers. And I don’t curse while sewing with it.
Annie says
Hi, I have tried making this but the minky fabric stretches out of shape everytime. What am i doing wrong!!! please help i have a minky dot fabric and a flannelette for the other side.
Sheila says
Gorgeous!
I was just wondering what kind of fabric is the top (polka dot fabric) is it just a cotton or more like a flannel?
Thanks!
Sattin says
Loved this! Just made 2 of them for a friend who is due next month. I did a couple of smaller ones (28in. x 36in. and 30in, X 45 in.) so I had only a small amount of material leftover.
Funniegirlie says
I’m a newbie at sewing. I saw the scrap dot kinky on sale so I bought it. I asked the fabric lady at the store if I need to have the batting in between the 2 fabric, and she said yes. In your instruction, there is no batting. Is it require? I suppose if you want it to be warmer, then you add the batting to make the blanket thicker?
Kelley P says
I would recommend a little quilting like maybe stitch a X from corner to corner. I hate it when the front and back are not aligned. More important, I also cut off all selvages. They often shrink at a different rate than the body of the fabric. I love making baby quilts with a pieced cotton front and a polar fleece back. Minky is even softer.
ASHLEY says
Do you have to use a special Minky needle for this project??
Ellen says
Thank you for this great tutorial! Love the blanket and the color choice.
Emma Green says
Oh my gosh, I love the fabric that you used for this adorable little blanket! Thank you for such an easy tutorial! I will definitely be trying this out for my little guy who is due to make an appearance in 2 months!
Michelle says
I love this blanket! Gorgeous!! I’m assuming you mean 1 and a quarter yards minky fabric, it looks like 11.4 yards. That would be one giant blanket! :0)
Ellie says
This looks so awesome and easy. I was just wondering if it was possible to make a bigger version???
Melissa says
Great tutorial! Thank you. I have made a few of these and I always have the same problem…I end up with extra minky fabric when I go to stitch the hole shut and it wrinkles, no mnatter how careful I am about measuring and pinning. Any suggestions for troubleshooting this problem? TIA
Rebecca Montgomery says
Hi just wondering where you get your mink fabric from? I’m from Australia and we don’t have it our fabric stores…
Kind regards
Rebecca
lacey says
What are these fabrics called so I can find them on fabric.com? The polka-dot is perfect for the baby colors I need. Also, woven cotten fabric is going to be thicker sort of like canvas, but not as stiff right? So, is it soft when washed??
Char says
Will this work for a bigger blanket, say to fit a twin size bed?
Arica says
Hey, so I’m here via pinterest, and I’m SO WANTING MINKY like this… where did you get it, i can’t find anything besides plain/dot ANYWHERE. any help would be so appreciated. thanks!
Casey says
Is the cotton fabric just regular quilting cotton or is it knit? Flannel? I’ve wanted to make one of these for a while, but I haven’t been sure what type of fabric to buy. Thanks!
Katy says
Hi! I’ve made these in the past, but the minky always drives me crazy! It seems that no matter how I try to get it the right size for use with the top piece, it stretches and doesn’t match up too well. I’ve only bought minky from Joann’s – – could my problem be that I just need to get better quality minky? OR, is that what the washing and drying will help prevent (I usually never wash my material first..need to do that!)
JenB says
How fast can I get to the fabric store to try this! It’s soooo cute! I want to make a couple for myself and for all the people I know having a baby this year. Thanks for the great instructions!
Julia says
Ok, I haven’t attempted this project (YET), but that tearing the fabric tip just changed my life!!! For some reason, squaring up the fabric and making sure it was all laid out right just intimidated the crud out of me! I just got finished trying your tip, and my fabric is PERFECT!! Thank you so so much. Off to quilt! 🙂
Nikki Bacso says
I have to agree with this. Also the little strips of fabric I tore off will make a cute tie for the finished product. 🙂
What I am having the most issues with is the minky sliding around and causing little bubbles/pockets between the two fabrics. Keeps it from looking totally neat and finished. :/
Dana says
I was writing with a quick question…I’m in the process of making one of these blankets for a baby shower gift, and I’m also pretty new to sewing…while following ur tutorial I noticed that when u turn ur blanket right side out, u can see where u have sewn it together….did u sew it again once u turned it right side out? If I’m doing this correctly and sewing it inside out, I should not see the stitching…or am I missing a step?? 🙂 thank u so much for ur help and ur tutorial!, I’m excited to finish it!!
Miranda says
I love this tutorial so much, your blanket was adorable!!!!! I have a question. I went to fabric.com to look for minky fabric and I ended up with the shaggy fabric which when i got it in the mail I almost cried because it was so non-infant approved… I was wondering if what you got was the Minky rose fabric???? I’m having trouble deciding on the website but nothing looked like what you used so I was just wondering. Thanks so much!
Lara says
The minky is actually a alligator/reptile pattern. You could always check out your local quilting shops, they generally carry nicer minky and may have a wider variety of designs to choose from.
If you go with a minky from fabric.com I would recommend the cuddle rose, cuddle paisley, or cuddle dimple dot designs: http://www.fabric.com/SearchResults2.aspx?Source=Header&SearchText=embossed+minky&CategoryID=1d5f47dc-9991-4088-93f3-26a376046a5e
I have a rose bud minky and the dimple dot minky for several of my baby’s blankets and I love them both. The Paisley print is a bit more girly and it is so soft and cute! I hope that helps!
hope that helps 🙂
Teresa says
Love it! Another request for the name/maker of the cotton fabric and the minky! Love them both and have been looking for something just like it for some time, but can’t find it anywhere:) Thanks!
Lara says
To be honest I have no idea what the designer name or collection those 2 fabrics are from. I stocked up on cute fabric and minky while it was on clearance. The minky is an alligator/reptile pattern. You could always check out your local quilting shops, they generally carry nicer minky and may have a wider variety of designs to choose from.
On Fabric.com they have several darling collections sporting polkadot prints similar to the one I used above.
The Kaufman Remix Collection: http://www.fabric.com/quilting-fabric-shop-by-designer-kaufman-designer-cotton-print-fabric-remix.aspx
and the Michael Miller Retro Collection: http://www.fabric.com/quilting-fabric-shop-by-designer-michael-miller-fabric-michael-miller-retro.aspx
If you go with a minky from fabric.com I would recommend the cuddle rose, cuddle paisley, or cuddle dimple dot designs: http://www.fabric.com/SearchResults2.aspx?Source=Header&SearchText=embossed+minky&CategoryID=1d5f47dc-9991-4088-93f3-26a376046a5e
good luck!
Teresa says
Thanks for the follow-up, Lara!
Tiffany says
LOVE this! I’m wanting to make my daughter’s blanket for her bed as I redecorate her room into a Dick & Jane, throw-back kind of style. Do you think I could do this blanket with a quilt front and just do buttons to quilt it on the fluffy side? Hmmm…I ‘m wondering! I plan on binding it with a slim (not wide) satin binding too (she LOVES those satin edges on the blankets!)
Teresa says
Oooh…just be careful with the buttons (choking hazard), they eventually work themselves loose!
Lara says
you could definitely quilt a front for it and then just use it as if it were a single piece of fabric, you shouldn’t even need to quilt it or tie it as long as it isn’t too large! You sound like you know what you’re doing 😉
Leticia says
Lovely blanket…If we do the 40×40, then we can probably do matching burp cloths with the left over minky.
Veronica says
Hi
This is so cute. I do not sew but I am a learner. This will be my first try. I have a question. Do I wash and dry the minky fabric before sewing? Thank you for your answer.
Lara says
Yep! Wash and dry both of the fabrics, just check the wash instructions when you purchase the fabrics!
Lisa M says
How nice a cozy. I’ll have put this on my mus make list.
Catrin says
Awww… this is a great baby blanket. It is adorable. I love it…
Greetings from Germany
Catrin
Katie says
This is adorable! Thanx for sharing the easy directions…XoXo
Kelley says
Hey! Great post today! I wish I could make this blanket(not saying I won’t) but my little Landry has more blankets than I know what to do with. She can’t use all of them to go to bed with…can she!?!?! 🙂 Thanks for sharing this. So cute.
Rhonda says
Great idea!!
Renee says
Love your fabric choice. Will you share the name? TIA!
Lara says
To be honest I have no idea what the designer name or collection those 2 fabrics are from. I stocked up on cute fabric and minky while it was on clearance, and unfortunately the designer name wasn’t on the selvage!
On Fabric.com they have several darling collections sporting polkadot prints similar to the one I used above.
The Kaufman Remix Collection: http://www.fabric.com/quilting-fabric-shop-by-designer-kaufman-designer-cotton-print-fabric-remix.aspx
and the Michael Miller Retro Collection: http://www.fabric.com/quilting-fabric-shop-by-designer-michael-miller-fabric-michael-miller-retro.aspx
hope that helps 🙂
Ashley says
Super cute!!! I am expecting a baby boy in a few months and he needs some blankies… I am totally going to make some of these!!!! I was wondering what type of minky you used? The one that is hanging over the crib edge. I can’t tell if it is the same print as the ones in the tutorial. They look different, but I could be wrong. I am in love with that style of minky and have never seen it before. Did you get it from Fabric.com?
Lara says
To be honest I have no idea what the designer name or collection those 2 fabrics are from. I stocked up on cute fabric and minky while it was on clearance. The minky is actually a alligator/reptile pattern. You could always check out your local quilting shops, they generally carry nicer minky and may have a wider variety of designs to choose from.
On Fabric.com they have several darling collections sporting polkadot prints similar to the one I used above.
The Kaufman Remix Collection: http://www.fabric.com/quilting-fabric-shop-by-designer-kaufman-designer-cotton-print-fabric-remix.aspx
and the Michael Miller Retro Collection: http://www.fabric.com/quilting-fabric-shop-by-designer-michael-miller-fabric-michael-miller-retro.aspx
If you go with a minky from fabric.com I would recommend the cuddle rose, cuddle paisley, or cuddle dimple dot designs: http://www.fabric.com/SearchResults2.aspx?Source=Header&SearchText=embossed+minky&CategoryID=1d5f47dc-9991-4088-93f3-26a376046a5e
hope that helps 🙂
Bethany says
Hi there! I found a link to your tutorial on pinterest. I’m just learning how to sew and I was wondering exactly what kind of minky fabric you used for the blanket pictured. I’d only be able to find the dot minky fabric, but I like the more shaggy look of the one you made.
Thanks!
Katy @ Live Laugh Love Craft says
Oh, good gravy! That is the cutest thing ever!! One of my bff’s is having a baby shower next month and this will be perfect!! Thanks so much for sharing. 🙂
Hilary says
i have a couple questions. i’m a beginner sewer 😉 i’m making this blanket right now and i wasn’t quite clear on 2 things. #1 what do you mean when you say “Start out by tearing the edge off of 2 touching sides.”? and #2 when you leave the hole to turn the fabric right side out, do you stitch it closed by hand or just leave it?
Thanks!
Lara says
So with the Cotton fabric.. when you are looking at it you are going to tdap the edge off of two touching sides.. like two sides that form am L shape. You will make a cut on the edge of those two sides. You’ll want to clip in about an inch from the edge. Then tear the fabric from that cut.
With the opening you will stitch that closed as you top stitch the rest of the blanket. Just be careful to make sure the raw edges are tucked well inside and the topstitching catches them.
Lara says
*tear (not tdap) 😉
Hilary says
haha THANK YOU for clarifying ‘tear’. i was like, oh crap now i’m gonna have to ask her what tdap means.
that all makes sense now. wish me luck! 🙂
Majik says
I understand the reason for tearing the fabric BUT if you are new to sewing and not comfortable tearing the fabric use scissors! I’m not a ripper. I use a rotary cutter or scissors. 😉 Happy sewing! w00t!
SheilaG says
This is a great project! Baby stole the show, by the way! 🙂
Vieve says
Love the blanket. Looks snuggly. I think I’ll make one for myself!
Rebecca says
This is SO cute and simple enough for a beginner like me!! Wahoo!! I have one question, though. Do you need to make any stitches in the center or around the blanket like a quilt?? (I guess that may not be an issue because there isn’t batting in the middle, right?)
Lara says
You won’t need any stitches between the layers 🙂 because there’s no batting (you’re right!)
Happy sewing!
Missy says
Lara – so adorable! I think I can even pull this off – it looks simple enough. Your baby is killing me! Those eyes are a photographer’s dream! 😉 Thanks for another great tutorial!
Ashleigh says
How simple is that!? I’m always looking for great ways to use minky and this is the most uncomplicated, (yet adorable and cuddly) way I’ve seen yet. Hmmmm… which one of my friends is pregnant because I need to make one!
Jelisa | Blogging Ever After says
Ohhhhhh my goodness, that is the cutest thing! I’ve got a sewing machine just hanging out in our hall closet because I don’t know how to use it… Stuff like this makes me think it’s time to learn.
Heather Lynne says
So cute!
& I’m in love with that last photo! 🙂
Alysha says
The blanket turned out so darn cute! And that little baby…ADORABLE!
Julie says
You’re KILLIN me! I’m cutting WAAAY back on spending and I’ve been doing great. Now, however, I’m convinced that both of my girls (and myself) NEED these!